How to Hem Dress Pants: A Practical Guide to Professional-Looking Results at Home

How to Hem Dress Pants: A Practical Guide to Professional-Looking Results at Home
Most dress pants arrive too long. It's one of those irritating facts of ready-to-wear clothing that manufacturers would rather sell you something you need to alter than risk losing a sale because the inseam was too short. So here you are, googling how to hem dress pants at home instead of paying someone $25 to $60 to do it for you and that's a reasonable choice, because this is genuinely not difficult once you understand what you're actually trying to accomplish.
The goal isn't just shortening fabric. It's creating an invisible finish that lets the trouser drape properly and doesn't announce itself every time you sit down. Professional tailors use specific techniques to achieve this, and most of them translate directly to home sewing with basic tools.
Why the "Break" Matters Before You Cut Anything
Before you touch scissors or thread, you need to understand trouser break the horizontal crease that forms where your pant leg meets your shoe. This single measurement determines whether your pants look intentional or accidental, and it's surprisingly personal. According to Michael Tailors, a bespoke tailoring firm, most men fall between a 30 and 34 inch inseam, but the right break depends on your height, the trouser's cut, and which decade's aesthetic you're going for.
A no break hem sits just above the shoe with no crease at all. It's the most modern look, favored in contemporary menswear and by anyone under 5'6" who doesn't want fabric pooling at their ankles. The tradeoff is that it can look too short when you sit down, exposing more sock than some dress codes appreciate.
A slight break creates one small horizontal fold where the fabric touches the shoe. This is the safest choice for most situations professional enough for conservative offices, contemporary enough that you won't look dated. It's what I'd recommend if you're unsure.
A medium break produces a more pronounced crease and a bit of fabric pooling at the front of the shoe. This was standard business dress for decades and still reads as classic rather than outdated, though it's definitely the choice of someone who's not trying to look trendy.
A full break involves significant fabric bunching, and unless you're deliberately going for a relaxed or vintage silhouette, it usually just looks like you bought pants that don't fit. I'd avoid it for dress trousers entirely.
Here's what most hemming guides skip: the back of your trouser leg should sit slightly longer than the front, usually by about half an inch. This compensates for the angle of your foot and prevents the back hem from riding up when you walk. If you pin both legs at exactly the same length all the way around, the back will look too short.
Tools and Materials for Hemming Dress Pants
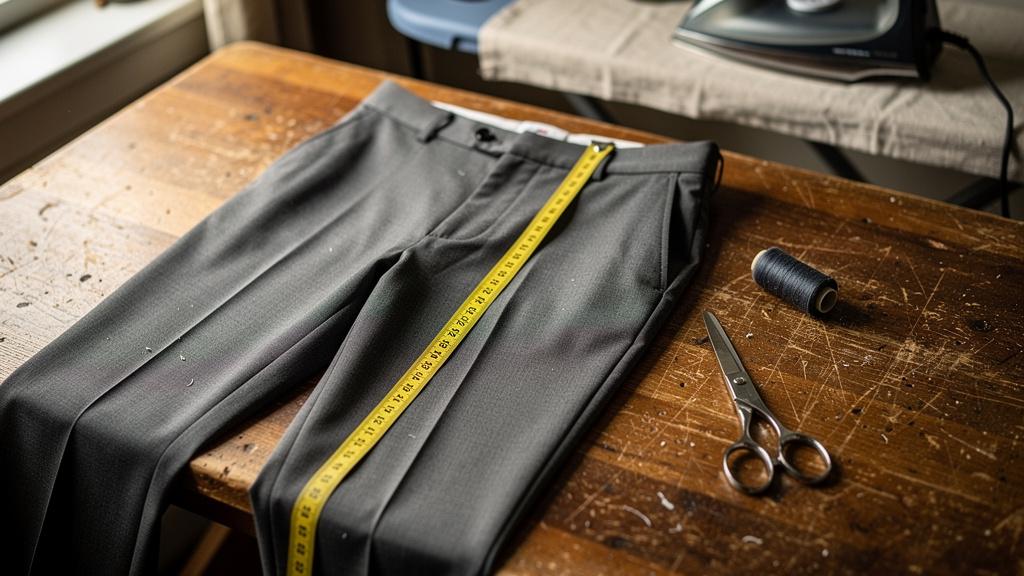
You need less than you think. A tape measure, pins, tailor's chalk or a fabric pencil, sharp scissors, an iron, and either a sewing machine with a blind hem foot or a hand needle with matching thread. The Daily Sew recommends thread that matches your fabric or runs one shade darker lighter thread shows more than darker thread against most trouser fabrics.
If you're hand-sewing, use a sharp needle rather than a ballpoint. Dress pants are typically woven fabric, not knit, and a sharp needle will pass through the weave cleanly instead of pushing fibers aside and creating visible holes.
One tool that's genuinely worth buying if you don't own one: a seam gauge. It's a small metal ruler with a sliding marker, and it makes measuring consistent hem allowances dramatically easier than trying to hold a tape measure in place while you pin.
How to Measure and Mark Your Hem on Dress Pants
This is the step that requires another person, and there's no good workaround. You cannot accurately measure your own trouser length while wearing the pants, because bending over to see your ankles changes how the fabric falls. Ask someone to help, or accept that you'll probably need to re-do this step at least once.
Put on the shoes you'll actually wear with these pants. Different heel heights change where the hem should fall, sometimes by more than an inch. Stand naturally on a hard floor carpet compresses under your weight and throws off measurements.
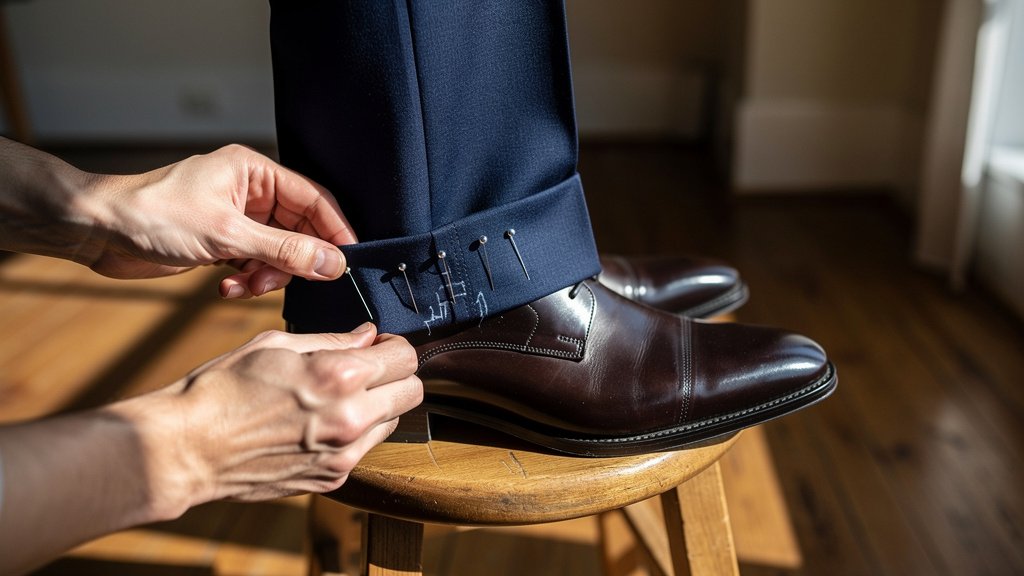
Have your helper fold the excess fabric under at the front of one leg until the break looks right to both of you. Pin it in place. Then check the back of the same leg and adjust if needed so the fabric just touches the top of your shoe's heel counter without dragging. Pin that too. Repeat for the other leg, measuring against the first rather than eyeballing it independently.
Once pinned, walk around for a minute. Sit down. Check that the hem doesn't ride up excessively when seated or drag when you walk. This is your last chance to adjust before cutting.
Now, with the pants off and turned inside out, measure from the fold you've pinned to the raw edge of the original hem. This tells you how much fabric you're removing. Write it down you'll need this number in a moment.
Determining Your Hem Allowance
The hem allowance is how much fabric you fold under to create the finished hem. For dress slacks, the standard is 1.5 to 2 inches. This adds weight to the bottom of the leg, which helps the trouser hang properly and creates a cleaner drape than a skimpy hem would.
If you're shortening pants by 3 inches and want a 1.5-inch hem allowance, you'd cut off 1.5 inches of fabric (3 inches minus 1.5 inches equals 1.5 inches to remove). If math isn't your strong suit, here's the formula: measure down from your pinned fold line by your desired hem allowance, then add another quarter inch for the raw edge fold. Mark this line all the way around the leg with tailor's chalk. Cut along the mark.
I've seen guides that recommend keeping the original hem allowance if there's enough fabric, but I'd push back on that. Original hems on ready-to-wear pants are often inconsistent, and you'll get better results starting fresh with a clean edge.
The Blind Hem Stitch: Hand Method
This is the technique professional tailors use on suit trousers, and it's the reason their hems are invisible from the outside. The stitches catch only a few threads of the outer fabric, making them virtually undetectable when done correctly. It takes longer than machine hemming, but for dress pants you'll wear to job interviews or client meetings, the extra time is worth it.
First, press your hem allowance to the wrong side of the fabric. Fold the raw edge under by a quarter inch and press again, creating a clean double fold. Pin in place, with pins perpendicular to the hem edge so you can remove them as you sew.
Thread your needle with about 18 inches of thread longer than that tends to tangle and knot. Tie a small knot at one end. Start at a side seam, hiding the knot inside the hem fold.
Here's where the technique gets specific: fold the hem back on itself so the folded edge extends about a quarter inch beyond the main fabric. You're essentially rolling the hem up to expose the fold. Take a tiny stitch we're talking two or three threads from the main trouser fabric, right next to where the hem fold sits. Then move about half an inch along the hem and take another tiny stitch through the folded edge of the hem allowance. Repeat this alternating pattern all the way around the leg.
The key is keeping your stitches loose. If you pull the thread tight, the hem will pucker and the stitches will show on the outside. You want just enough tension to hold the fabric in place, not to cinch it. When you reach your starting point, take a few small stitches in place to secure the thread, then bury the tail inside the hem fold and clip it.
A properly executed blind hem should be completely invisible from the right side of the garment. If you can see small dots or puckers where your stitches are, you're either catching too much fabric or pulling too tight.
Machine Blind Hemming: Faster but Trickier
Most sewing machines have a blind hem stitch setting it's usually represented by a zigzag pattern with one wider stitch interrupting several straight ones. The machine mimics what you'd do by hand, taking tiny bites of the main fabric at regular intervals while sewing along the hem fold.
You'll need a blind hem presser foot, which has a guide that helps you position the fabric correctly. If your machine didn't come with one, they're available for most models for under $15 and genuinely make a difference.
The setup is similar to hand hemming: press your hem allowance, fold the raw edge under, and pin. Then fold the hem back on itself just like you would for hand sewing, exposing the folded edge. Position this under your presser foot so the guide runs along the fold and the needle catches just a few threads of the main fabric with each wide stitch.
According to The Daily Sew, the machine blind stitch produces results that look "just like a hand-sewn hem" when done correctly. I'd qualify that slightly machine blind hems are very good, but a careful hand hem on fine wool suiting is still detectably better under close inspection. For everyday dress pants, though, the machine method is absolutely professional quality and takes a fraction of the time.
The learning curve is real. Expect to practice on scrap fabric before you commit to your actual pants. The most common mistake is positioning the fold incorrectly so the wide stitch catches too much fabric, creating visible stitches on the outside. If that happens, your guide isn't aligned properly.
When to Use a Topstitch Instead
Not every pair of dress pants needs an invisible hem. Chinos, cotton trousers, and less formal dress pants often look fine and sometimes better with a visible topstitch. This is the same technique used on jeans: fold the hem, press it, and sew a straight line of stitching around the leg, visible from the outside.
The advantage is speed and durability. A topstitched hem takes five minutes per leg and will survive years of washing without coming loose. The disadvantage is that it's obviously a hem, which can look too casual for formal wool trousers or suit pants.
If you're hemming pants you'll wear with a blazer to business meetings, use a blind hem. If you're hemming pants you'll wear with a polo shirt to a casual Friday, topstitching is fine.
Pressing: The Step Everyone Skips
A hem that isn't properly pressed will never look professional, no matter how well you sewed it. This is the step that separates home alterations from tailor-quality work, and it's the step most people rush through or skip entirely.
After sewing, press the hem from the inside of the garment using a pressing cloth a piece of cotton muslin or even a clean dish towel works. The pressing cloth prevents shine on wool fabrics and protects synthetics from heat damage. Use steam if your iron has it, and press with an up-and-down motion rather than sliding the iron, which can stretch the fabric.
For wool dress pants, some tailors recommend pressing from the inside only to avoid creating shine on the outside of the leg. I've found this matters more with very fine wool than with everyday suiting fabric, but it's worth being cautious if you're working with expensive trousers.
Let the pants cool completely before wearing or hanging them. Fabric that's still warm from pressing can stretch or crease in ways you don't want.
What About Hem Tape?
Fusible hem tape the iron-on adhesive strips sold at fabric stores technically works, but I wouldn't use it on dress pants you care about. The adhesive can fail after multiple dry cleanings, leaving you with a hem that's coming undone at an inconvenient moment. It also creates a slightly stiff feel along the hem that's detectable when you touch the fabric.
For a temporary fix say, you need to wear the pants tomorrow and don't have time to sew hem tape is fine. But plan to replace it with actual stitching when you have the chance. I've seen too many hem tape failures at exactly the wrong moment to recommend it as a permanent solution.
Cost Comparison: DIY vs. Tailor
According to pricing data from multiple alterations shops, a basic trouser hem runs $18 to $30 in most U.S. markets, with higher prices in major cities. Thumbtack's national average for hemming services is $73 to $107, though that figure likely includes more complex alterations bundled together. New York City tailors charge $40 to $60 for simple pant hems, according to Taily, a tailoring service platform.
If you own a sewing machine and basic supplies, hemming pants at home costs nothing beyond your time. If you need to buy supplies, a basic sewing kit with needles, thread, and pins runs under $15 and will last through dozens of hemming projects.
If you hem three pairs of pants yourself instead of paying a tailor, you've saved $60 to $180 depending on your local prices a reasonable return on an hour or two of learning time.
Common Mistakes and How to Avoid Them
Measuring without wearing the right shoes is the most frequent error, and it's the hardest to fix after the fact. Always, always measure with the actual shoes you'll wear.
Cutting too much fabric is the second most common mistake, and it's why I recommend leaving a full 1.5 to 2 inch hem allowance even if the original pants had less. You can always take more off later; you can't add fabric back.
Pulling hand stitches too tight creates visible puckers on the outside of the garment. If you're seeing dots or dimples where your stitches are, you're pulling too hard.
Skipping the pressing step makes even well-sewn hems look amateur. Press before you sew to set the fold, then press again after you sew to finish the hem.
One thing I haven't been able to find good data on: whether different fabric weights require different hem allowances for optimal drape. Most guides recommend 1.5 to 2 inches universally, but intuitively it seems like a heavy wool flannel might want more weight at the hem than a lightweight tropical wool. If anyone has tested this systematically, I haven't found their work.
Hemming Lined or Cuffed Dress Pants
Lined trousers add a layer of complexity because you're hemming two fabrics that need to hang together without one pulling on the other. The standard approach is to hem the lining separately, about half an inch shorter than the outer fabric, so it doesn't show below the hem edge. Use a simple turned hem on the lining rather than a blind hem it doesn't need to be invisible since it's inside the pant leg.
Cuffed pants are a different animal entirely. The cuff is folded to the outside of the leg, typically 1.25 to 1.75 inches deep, and tacked in place at the seams. If you're shortening cuffed pants, you need to remove the existing cuff, hem the pants to the new length, and then recreate the cuff. This is genuinely more complex than a standard hem, and if you're not confident in your skills, it might be worth paying a tailor for cuffed trousers specifically.
Cuffed pants take roughly twice as long to hem correctly as plain-hem trousers, and the margin for error is smaller because the cuff has to be even all the way around.
When to Pay a Professional Instead
Some alterations are better left to professionals. If your pants need tapering in addition to hemming making the leg narrower below the knee that's a more complex job that affects the overall silhouette and is easy to get wrong. If you're working with very expensive fabric, a silk-wool blend or fine Italian suiting, the cost of a mistake can easily exceed what a tailor would have charged.
If you've never sewn anything before, I'd suggest practicing on a pair of pants you don't care about before attempting your good dress trousers. The techniques aren't difficult, but there's a learning curve, and it's better to make your mistakes on $30 chinos than on $200 suit pants.
That said, basic hemming is absolutely a learnable skill for anyone willing to spend an hour or two practicing. The first pair might take you 45 minutes per leg; by the third pair, you'll have it down to 15 minutes. And once you know how to hem dress pants properly, you'll never again have to schedule a tailor appointment or wait a week to wear something you just bought.